
3D Unity弩箭射击靶子
上述代码的Start()初始化音效,private void OnCollisionEnter(Collision collision),会在碰撞到tag为“Target”或“Target2”的对象时,播放声音。使用unity官方的Standard Assets,里面有第一人称组件FPSController预制件,拖拽到游戏中,即可实现第一人称的行动。游戏设置上,只有玩家站在特定的位置上才可进行开
目录
1.使用 动画机 与 动画融合, 实现十字驽蓄力半拉弓,然后 hold,择机 shoot;
2.然后再弩弓上搭载下面的控制代码(下面的代码还包含了其他功能,但放在后文解释)
前言
本文将涉及下面的内容:
- 游戏场景
- 地形:使用地形组件,上面有山、路、草、树;(可使用第三方资源改造)
- 天空盒:使用天空盒,天空可随 玩家位置 或 时间变化 或 按特定按键切换天空盒;
- 固定靶:使用静态物体,有一个以上固定的靶标;(注:射中后状态不会变化)
- 运动靶:使用动画运动,有一个以上运动靶标,运动轨迹,速度使用动画控制;(注:射中后需要有效果或自然落下)
- 射击位:地图上应标记若干射击位,仅在射击位附近或区域可以拉弓射击,每个位置有 n 次机会;
- 摄像机:使用多摄像机,制作 鸟瞰图 或 瞄准镜图 使得游戏更加易于操控;
- 声音:使用声音组件,播放背景音 与 箭射出的声效;
- 运动与物理与动画
- 游走:使用第一人称组件,玩家的驽弓可在地图上游走,不能碰上树和靶标等障碍;
- 射击效果:使用 物理引擎 或 动画 或 粒子,运动靶被射中后产生适当效果。
- 碰撞与计分:使用 计分类 管理规则,在射击位射中靶标得相应分数,规则自定;(注:应具有现场修改游戏规则能力)
- 驽弓动画:使用 动画机 与 动画融合, 实现十字驽蓄力半拉弓,然后 hold,择机 shoot;
一、游戏场景
1.地形制作
创建地形对象
- 打开Unity场景。
- 在菜单栏中选择 GameObject → 3D Object → Terrain。
调整地形设置
- 选中地形对象,在Inspector面板中找到 Terrain Settings。
- 调整参数
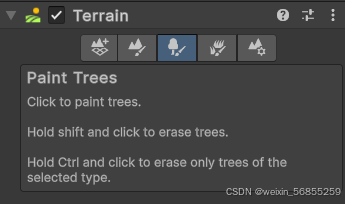
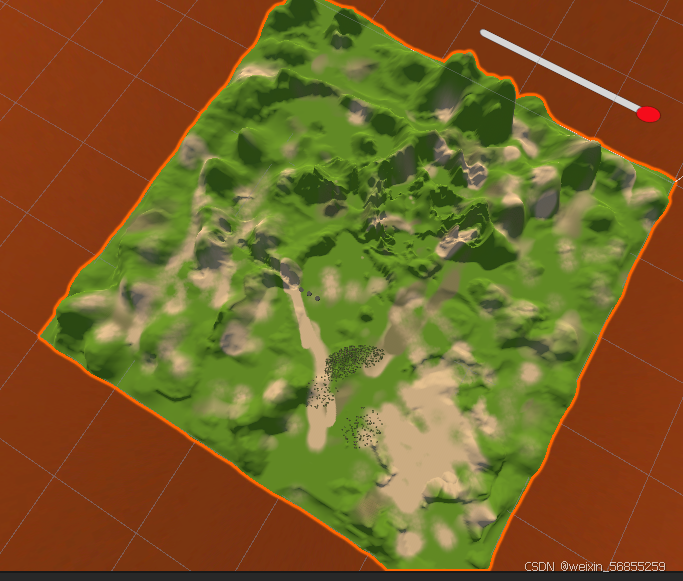
使用地形工具塑造地形
最终地形
2.动态天空盒制作
-
导入天空盒材质
- 在Unity中,你可以使用内置的天空盒,或从Asset Store下载新的天空盒素材。
- 将天空盒材质导入到项目中(通常是
.mat文件)。
-
打开Lighting Settings面板
- 在菜单栏中,选择 Window → Rendering → Lighting。
- 在Lighting面板中找到 Environment 部分。
-
应用天空盒材质
- 在 Skybox Material 字段中,点击选择框。
- 从项目中选择你导入的天空盒材质。
如何制作动态的天空盒:
控制代码TimeManager.cs如下
using UnityEngine;

public class TimeManager : MonoBehaviour
{
    public Material[] skyboxes; // 挂载不同时间段的天空盒材质
    public Light directionalLight; // 场景中的主光源
    public float dayDuration = 5f; // 一天的持续时间(秒)

    private float timer;
    private int currentSkyboxIndex = 0;

    void Start()
    {
        timer = 0f;
        RenderSettings.skybox = skyboxes[currentSkyboxIndex];
    }

    void Update()
    {
        timer += Time.deltaTime;

        float timeFraction = timer / dayDuration;
        int newSkyboxIndex = Mathf.FloorToInt(timeFraction * skyboxes.Length) % skyboxes.Length;

        if (newSkyboxIndex != currentSkyboxIndex)
        {
            ChangeSkybox(newSkyboxIndex);
            currentSkyboxIndex = newSkyboxIndex;
        }

        RotateSun(timeFraction);
    }

    void ChangeSkybox(int index)
    {
        RenderSettings.skybox = skyboxes[index];
        DynamicGI.UpdateEnvironment(); // 更新全局照明
    }

    void RotateSun(float timeFraction)
    {
        float angle = timeFraction * 360f - 90f;
        directionalLight.transform.rotation = Quaternion.Euler(new Vector3(angle, 170, 0));
    }
}
制作一个空对象比如EnvironmentManager,如何把代码搭载其上,记得配置对象的天空盒材质和光:

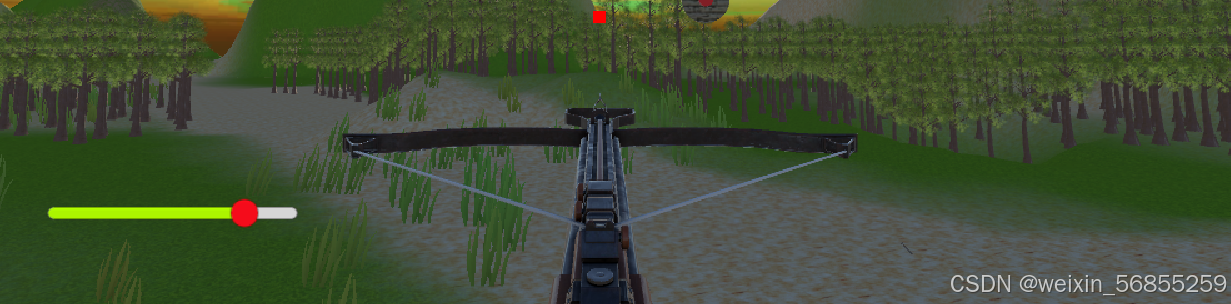
二、第一人称游走的弩弓
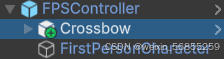
使用unity官方的Standard Assets,里面有第一人称组件FPSController预制件,拖拽到游戏中,即可实现第一人称的行动。
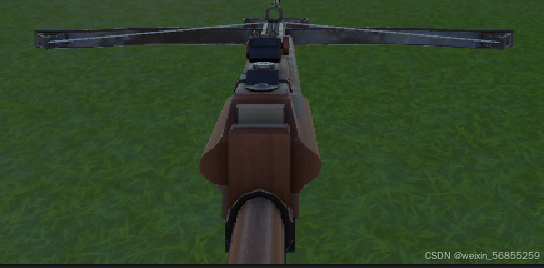
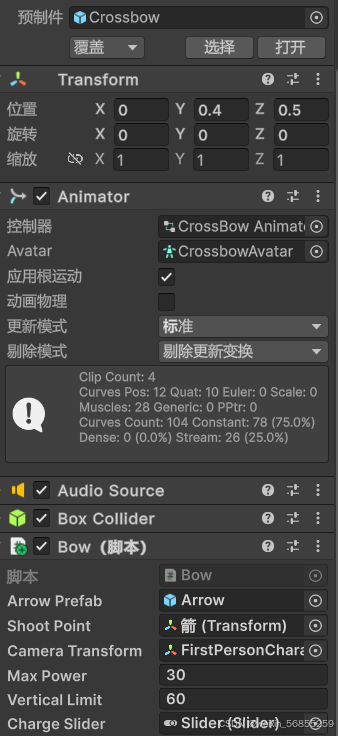
至于弩弓, Classical Crossbow 资源导入后,选择其中Crossbow预制件,放置在FPSController的子对象之下,大概像下图:
三、驽弓动画:
1.使用 动画机 与 动画融合, 实现十字驽蓄力半拉弓,然后 hold,择机 shoot;
打开Crossbow的动画控制器,显示下面:
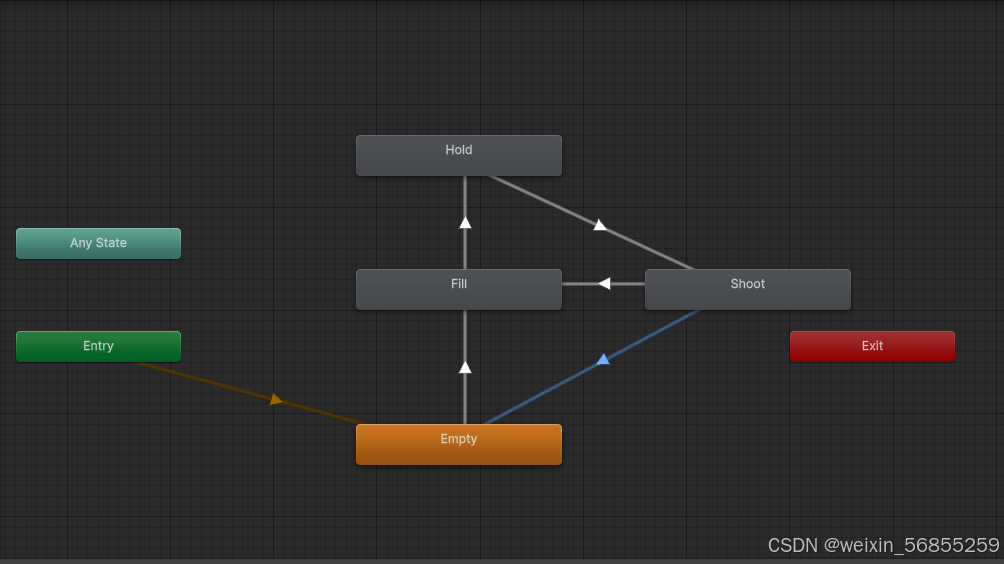
点击每一个过渡,按照下面配置条件:
Empty->Fill:Fire==true
Fill->Hold:Holding==true
Hold->Shoot:Fire==false
Shoot->Fill:Fire==true
Shoot->Empty:Fire==false
2.然后再弩弓上搭载下面的控制代码(下面的代码还包含了其他功能,但放在后文解释)
using UnityEngine;
using UnityEngine.UI;

public class Bow : MonoBehaviour
{
    public GameObject arrowPrefab;  // 弩箭预制件
    public Transform shootPoint;    // 发射点
    public Transform cameraTransform; // 摄像机的 Transform
    public float maxPower = 30f;    // 最大蓄力值
    private float currentPower = 0f;
    private bool isCharging = false;
    private bool isFiring = false;

    private Animator animator;      // 引用 Animator 组件
    public float verticalLimit = 60f; // 最大上下旋转角度
    private float currentVerticalRotation = 0f;

    private ShootPlace[] shootPlaces;  // 引用所有射击位对象
    private ShootPlace NowPlace;

    private AudioSource audioSource;  // 音频源
    // UI 进度条
    public Slider chargeSlider; // 进度条引用

    void Start()
    {
        animator = GetComponent<Animator>(); // 获取 Animator 组件
        shootPlaces = FindObjectsByType<ShootPlace>(FindObjectsInactive.Include, FindObjectsSortMode.None);

        audioSource = gameObject.AddComponent<AudioSource>();
        audioSource.playOnAwake = false;  // 防止音效在开始时播放

        AudioClip hitSound = Resources.Load<AudioClip>("Audios/shoot");
        if (hitSound != null)
        {
            audioSource.clip = hitSound;  // 设置音效剪辑
        }
        else
        {
            Debug.LogWarning("Hit sound not found in Resources/Audios/HitTarget!");
        }
    }

    void Update()
    {
        HandleBowRotation();  // 处理弩的旋转
        HandleChargingAndFiring();  // 处理蓄力和射击
    }

    void HandleBowRotation()
    {
        // 获取摄像机的上下旋转
        float cameraRotationX = cameraTransform.eulerAngles.x;

        // 将旋转角度限制在 [-180, 180] 范围内
        if (cameraRotationX > 180f)
            cameraRotationX -= 360f;

        // 限制上下旋转角度
        currentVerticalRotation = Mathf.Clamp(cameraRotationX, -verticalLimit, verticalLimit);

        // 更新十字弩的旋转,使其与摄像机的旋转一致
        transform.rotation = Quaternion.Euler(currentVerticalRotation, cameraTransform.eulerAngles.y, 0);
    }
    bool IsInShootingPlace()
    {
        // 遍历所有射击位,检查玩家是否在其中一个射击位内
        foreach (var spot in shootPlaces)
        {
            NowPlace = spot;
            if (spot.IsPlayerInShootPlace())
            {
                return true;
            }
        }
        return false;
    }

    void HandleChargingAndFiring()
    {
        // 按下鼠标左键开始蓄力
        if (Input.GetMouseButtonDown(0) && !isFiring && IsInShootingPlace()) // 检查射击位
        {
            StartCharging();
        }

        // 持续蓄力
        if (Input.GetMouseButton(0) && isCharging)
        {
            Charge();
        }

        // 松开鼠标发射弩箭
        if (Input.GetMouseButtonUp(0) && isCharging)
        {
            // 播放击中音效
            if (audioSource.clip != null)
            {
                Debug.Log("Sound Play!");
                audioSource.Play();
            }
            else
            {
                Debug.Log("No Sound!");
            }
            NowPlace.DecreaseShotLimit();
            ReleaseArrow();
        }
    }

    void StartCharging()
    {
        isCharging = true;
        currentPower = 0f;
        animator.SetBool("Fire", true);  // 设置 Fire 为 true,触发 Empty → Fill
        animator.SetBool("Holding", true); // 持续持弓(Fill -> Hold 过渡条件)
    }

    void Charge()
    {
        if (currentPower < maxPower)
        {
            currentPower += Time.deltaTime * 10f;  // 蓄力增加
        }
        currentPower = Mathf.Clamp(currentPower, 0f, maxPower);  // 限制蓄力值

        // 更新 UI 进度条
        if (chargeSlider != null)
        {
            chargeSlider.value = currentPower;
        }
    }

    void ReleaseArrow()
    {
        isCharging = false;
        isFiring = true;
        animator.SetBool("Fire", false);  // 设置 Fire 为 false,触发 Hold → Shoot

        // 实例化并发射弩箭
        GameObject arrow = Instantiate(arrowPrefab, shootPoint.position, shootPoint.rotation);
        arrow.tag = "Arrow";  // 动态设置标签

        // 设置弩箭的图层为 "ArrowLayer"
        arrow.layer = LayerMask.NameToLayer("ArrowLayer");

        // 设置弩箭的速度
        Rigidbody rb = arrow.GetComponent<Rigidbody>();
        rb.velocity = shootPoint.forward * currentPower; // 设置弩箭速度

        currentPower = 0f;  // 重置蓄力值
        chargeSlider.value = currentPower;
        animator.SetBool("Fire", true);  // 设置 Fire 为 true,触发 Shoot → Fill
        animator.SetBool("Holding", false); // 结束持弓(填充过程)

        // 发射完弩箭后,让弩箭返回空状态
        Invoke(nameof(ResetBow), 0); // 延迟后恢复到 Empty 状态
    }


    void ResetBow()
    {
        animator.SetBool("Fire", false);  // 设置 Fire 为 false,触发 Shoot → Empty
        isFiring = false;
    }
}
3.发射的声音
上述代码的Start()初始化音效,然后在void HandleChargingAndFiring():“松开鼠标发射弩箭”部分播放音效。
4.配置:
四、弩箭控制代码
前文已经给出发射弩箭的代码,下面给出弩箭的控制代码Arrow.cs,其需要提前配置在Arrow预制体上:
using UnityEngine;

public class Arrow : MonoBehaviour
{
    private AudioSource audioSource;  // 音频源

    void Start()
    {
        // 添加 AudioSource 组件并配置
        audioSource = gameObject.AddComponent<AudioSource>();
        audioSource.playOnAwake = false;  // 防止音效在开始时播放

        // 加载音效剪辑(确保 Audios 文件夹在 Resources 目录中)
        AudioClip hitSound = Resources.Load<AudioClip>("Audios/HitTarget");

        if (hitSound != null)
        {
            audioSource.clip = hitSound;  // 设置音效剪辑
        }
        else
        {
            Debug.LogWarning("Hit sound not found in Resources/Audios/HitTarget!");
        }
    }

    private void OnCollisionEnter(Collision collision)
    {
        if (collision.gameObject.CompareTag("Target") || collision.gameObject.CompareTag("Target2"))  // 假设靶子有标签 "Target"
        {
            PlayCollisionEffect();
            // 播放击中音效
            if (audioSource.clip != null)
            {
                Debug.Log("Sound Play!");
                audioSource.Play();
            }
            else
            {
                Debug.Log("No Sound!");
            }

            // 如果箭射中靶子,调用 MainController 的 AddScore 方法加分
            if (collision.gameObject.CompareTag("Target"))
            {
                ScoreDisplay.Instance.DisplayScore(MainController.Instance.AddScore(0));
            }
        }
    }

    private void PlayCollisionEffect()
    {
        // 在碰撞点生成粒子效果
        GameObject effect = Instantiate(Resources.Load<GameObject>("ArrowHitEffect"), transform.position, Quaternion.identity);

        // 销毁效果对象(例如在 2 秒后)
        Destroy(effect, 2.0f);
    }
}
1.关于标签
在对象的检查器左上角设置,没有想要的标签就得自己添加。
2.射中靶子的声音:
上述代码的Start()初始化音效,private void OnCollisionEnter(Collision collision),会在碰撞到tag为“Target”或“Target2”的对象时,播放声音。
3.计分
OnCollisionEnter(Collision collision)通过ScoreDisplay.Instance.DisplayScore(MainController.Instance.AddScore(0));调用主控制器的单例和分数显示的单例,一边计分并显示分数特效。实现在后文。
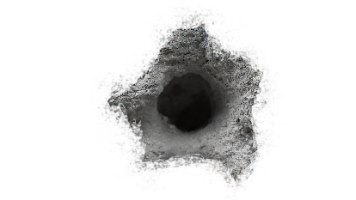
4.粒子效果
通过unity即可便捷地创建粒子效果对象,将其放置在Resources文件夹作为预制,通过OnCollisionEnter调用下面的函数显示粒子效果。
private void PlayCollisionEffect()
{
// 在碰撞点生成粒子效果
GameObject effect = Instantiate(Resources.Load<GameObject>("ArrowHitEffect"), transform.position, Quaternion.identity);
// 销毁效果对象(例如在 2 秒后)
Destroy(effect, 2.0f);
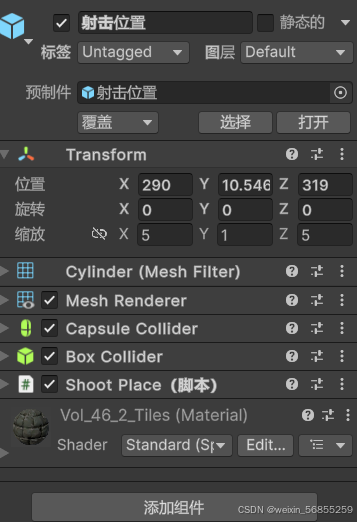
}五、射击位
游戏设置上,只有玩家站在特定的位置上才可进行开弓射箭,思路是制作射击位对象并搭载控制代码,当玩家与之碰撞才可射击,射击的机会有限。

1.BoxCollider记得勾选“是触发器”,没有则要添加这个组件。
2.控制代码ShootPlace.cs:
using UnityEngine;
public class ShootPlace : MonoBehaviour
{
private bool playerInside = false; // 玩家是否在射击位内
private int shotLimit = 10; // 每个射击位的射击次数限制
// 碰撞器触发器事件:检测玩家进入射击位
private void OnTriggerEnter(Collider other)
{
Debug.Log($"Object entered: {other.name}");
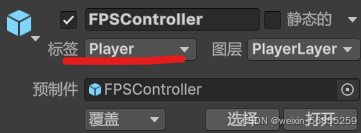
if (other.CompareTag("Player")) // 假设玩家对象有 "Player" 标签
{
MainController.Instance.AddShot(shotLimit);
playerInside = true;
}
}
// 碰撞器触发器事件:检测玩家离开射击位
private void OnTriggerExit(Collider other)
{
Debug.Log($"Object exited: {other.name}");
if (other.CompareTag("Player"))
{
MainController.Instance.AddShot(-shotLimit);
playerInside = false;
}
}
// 提供接口:检查玩家是否在射击位内
public bool IsPlayerInShootPlace()
{
Debug.Log(playerInside);
return playerInside&&(shotLimit!=0);
}
// 提供接口:获取剩余射击次数
public int GetShotLimit()
{
return shotLimit;
}
// 提供接口:减少射击次数
public void DecreaseShotLimit()
{
if (shotLimit > 0)
{
shotLimit--;
MainController.Instance.AddShot(-1);
Debug.Log($"Shot limit decreased. Remaining shots: {shotLimit}");
}
else
{
Debug.Log("No more shots remaining.");
}
}
}
3.设置玩家标签
六、计分控制器
1.ScoreRecorder.cs
设计上,使用分数表,易于统一修改。
using UnityEngine;

public class ScoreRecorder
{
    private int score = 0;  // 当前得分

    // 分数规则映射表(索引是 point 值,元素是对应的分数)
    private int[] scoreMapping = new int[] { 10, 100 };

    // 增加分数
    public int AddScore(int points)
    {
        if (points >= 0 && points < scoreMapping.Length)
        {
            score += scoreMapping[points];
            return scoreMapping[points];
        }
        else
        {
            Debug.LogWarning("Invalid point value: " + points);
        }
        return scoreMapping[points];
        Debug.Log("Current Score: " + score);  // 打印当前得分
    }

    // 获取当前得分
    public int GetScore()
    {
        return score;
    }

    // 设置或更改分数规则
    public void SetScoreMapping(int[] newMapping)
    {
        scoreMapping = newMapping;
    }
}
七、UserGUI
功能是显示分数,和剩余射击次数,以及R键调用主控制器的加载场景功能。
using UnityEngine;

public class UserGUI : MonoBehaviour
{
    private int score = 0;  // 用于显示的分数
    public MainController mainController;
    private int shot = 0;

    void OnGUI()
    {
        // 设置字体样式和大小
        GUIStyle style = new GUIStyle();
        style.fontSize = 30;
        style.normal.textColor = Color.white;

        // 显示分数
        GUI.Label(new Rect(10, 10, 200, 50), "Score: " + score, style);

        // 显示可发射箭数量
        GUI.Label(new Rect(10, 60, 150, 50), "Shot Remain: " + shot, style);
        // 检测按键 "R" 按下时重新加载场景
        if (Input.GetKeyDown(KeyCode.R))
        {
            mainController.LoadScene();  // 调用主控制器的加载场景方法
        }
    }

    // 更新分数显示
    public void UpdateScore(int newScore)
    {
        score = newScore;
    }

    public void UpdateShot(int newsShot)
    {
        shot = newsShot;
    }
}
八、主控制器
成员
public static MainController Instance;
public ScoreRecorder scoreRecorder;
public UserGUI userGUI;  // 添加 UserGUI 引用
public int shot = 0;
单例模式,可全局调用
void Awake()
{
    // 单例模式,确保只存在一个 MainController
    if (Instance == null)
    {
        Instance = this;
        DontDestroyOnLoad(gameObject);  // 确保场景切换时 MainController 不被销毁
    }
    else
    {
        Destroy(gameObject);  // 如果已经有实例,销毁当前实例
    }

    // 初始化 scoreRecorder
    if (scoreRecorder == null)
    {
        scoreRecorder = new ScoreRecorder();  // 查找场景中的 ScoreRecorder
    }

    if (scoreRecorder == null)
    {
        Debug.LogError("ScoreRecorder is not assigned or found in the scene.");
    }

    // 初始化 UserGUI
    userGUI = gameObject.AddComponent<UserGUI>();  // 直接添加 UserGUI 脚本
    userGUI.mainController = this;  // 将当前主控制器赋给 UserGUI
}
更新GUI
public int AddScore(int points)
{
    int p = scoreRecorder.AddScore(points);
    userGUI?.UpdateScore(scoreRecorder.GetScore());  // 更新 UserGUI 显示的分数
    return p;
}

public void AddShot(int newshot)
{
    shot += newshot;
    userGUI?.UpdateShot(shot);
}
加载场景
public void LoadScene()
{
Debug.Log("LoadScene");
string currentSceneName = SceneManager.GetActiveScene().name;
SceneManager.LoadScene(currentSceneName);
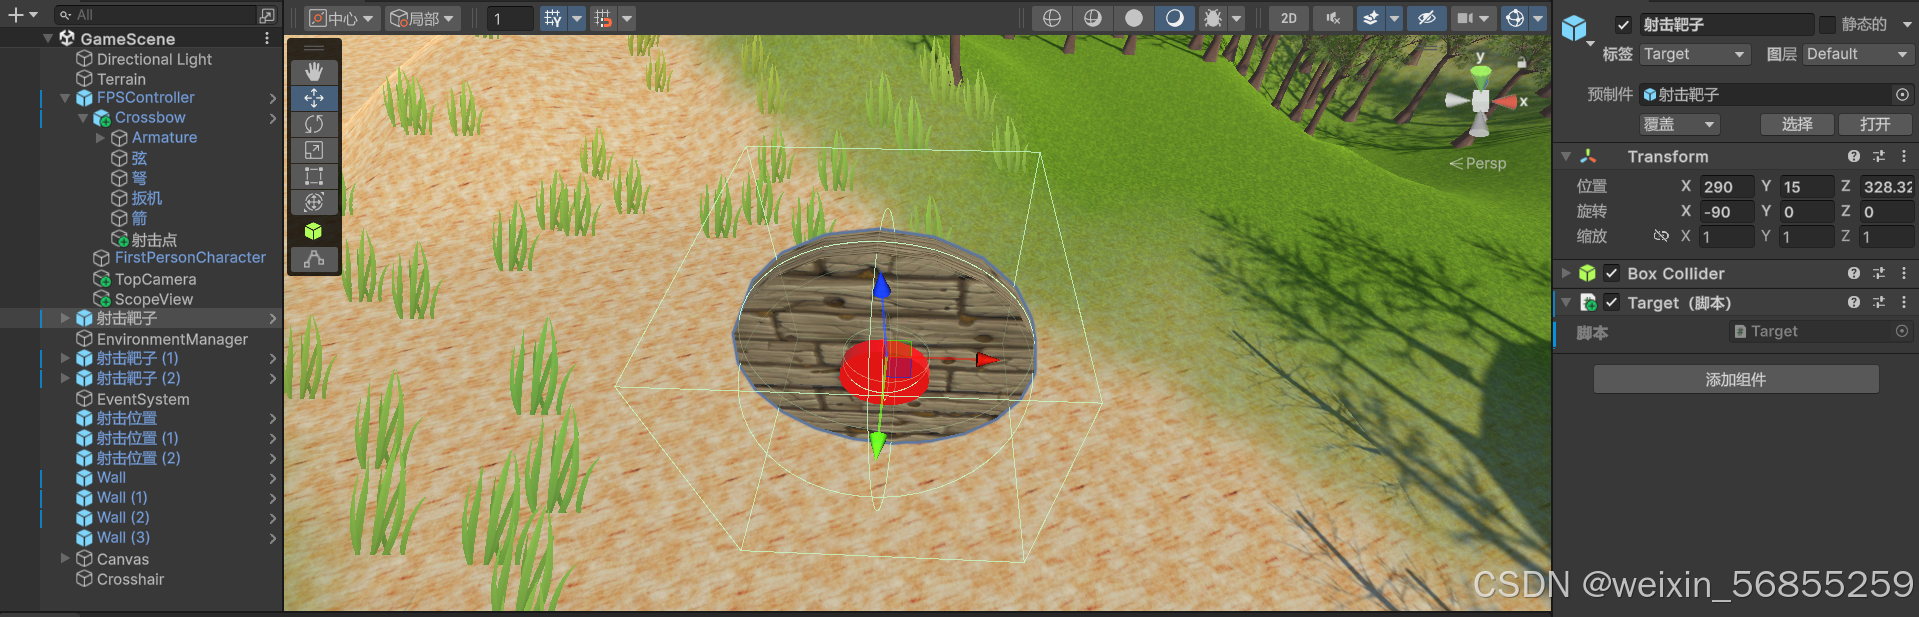
}九、靶子
设计
标签设置为Target(静态靶子)或者Target2(动态靶子),添加BoxCollider勾选是触发器,添加Target代码。
Target.cs
using UnityEngine;

public class Target : MonoBehaviour
{
    private Animator animator;
    private bool isHit = false; // 标记是否被击中
    private Rigidbody rb;
    private AudioSource audioSource;  // 音频源

    void Start()
    {
        Debug.Log("Start!");
        animator = GetComponent<Animator>();
        rb = GetComponent<Rigidbody>();

        // 添加 AudioSource 组件并配置
        audioSource = gameObject.AddComponent<AudioSource>();
        audioSource.playOnAwake = false;  // 防止音效在开始时播放

        // 加载音效剪辑(确保 Audios 文件夹在 Resources 目录中)
        AudioClip hitSound = Resources.Load<AudioClip>("Audios/HitTarget");

        if (hitSound != null)
        {
            audioSource.clip = hitSound;  // 设置音效剪辑
        }
        else
        {
            Debug.LogWarning("Hit sound not found in Resources/Audios/HitTarget!");
        }
    }

    void OnTriggerEnter(Collider other)
    {
        Debug.Log("Collision with: " + other.gameObject.name);
        if (other.CompareTag("Arrow") && !isHit)
        {
            isHit = true;  // 防止重复触发
            Debug.Log("Target Score");
            ScoreDisplay.Instance.DisplayScore(MainController.Instance.AddScore(1));
            // 播放击中音效
            if (audioSource.clip != null)
            {
                Debug.Log("Sound Play!");
                audioSource.Play();
            }
            else
            {
                Debug.Log("No Sound!");
            }

            HandleHit();  // 处理击中逻辑
        }
    }

    void HandleHit()
    {
        Debug.Log("HandleHit");
        animator.ResetTrigger("HitTrigger");
        animator.SetTrigger("HitTrigger");

        StopMovement();  // 停止对象移动,但启用重力
    }

    void StopMovement()
    {
        if (rb != null)
        {
            rb.velocity = Vector3.zero;       // 停止当前速度
            rb.angularVelocity = Vector3.zero;
            rb.useGravity = true;            // 启用重力
            rb.isKinematic = false;          // 受物理影响
        }
    }

    void Update()
    {
        if (isHit && !rb.isKinematic) // 如果已击中且未静止
        {
            if (Physics.Raycast(transform.position, Vector3.down, out RaycastHit hit, 0.1f))
            {
                rb.isKinematic = true;       // 停止物理运动
                rb.velocity = Vector3.zero; // 确保完全静止
                transform.position = hit.point; // 调整到地面精确位置
            }
        }
    }
}
动画功能实现相对移动靶子
如果是动态靶子,为了实现相对变化,额外添加下面的代码:
using System.Collections;
using System.Collections.Generic;
using UnityEngine;

/// <summary>
/// 此脚本使得在 Animation 中可以使用相对坐标和旋转
/// </summary>
[RequireComponent(typeof(Animation))]
public class RelativePositionAndRotationForAnimation : MonoBehaviour
{
    [HideInInspector] public Vector3 position;    // 相对位置
    [HideInInspector] public Vector3 rotation;    // 相对旋转

    private Vector3 startPosition;
    private Quaternion startRotation;

    void Start()
    {
        // 记录初始位置和旋转
        this.startPosition = this.transform.position;
        this.startRotation = this.transform.rotation;

        // 获取 Animation 组件并播放默认动画
        Animation anim = GetComponent<Animation>();
        if (anim != null && anim.clip != null)
        {
            anim.Play();
        }
    }

    void Update()
    {
        // 计算新的位置
        Vector3 newPos = this.startPosition + this.position;
        if (newPos != this.startPosition)  // 检查位置是否发生变化
            this.transform.position = newPos;

        // 计算新的旋转
        Quaternion newRotation = this.startRotation * Quaternion.Euler(this.rotation);
        if (newRotation != this.startRotation)  // 检查旋转是否发生变化
            this.transform.rotation = newRotation;
    }
}
打开窗口---->>动画---->>动画,点击要编辑动画的物体()
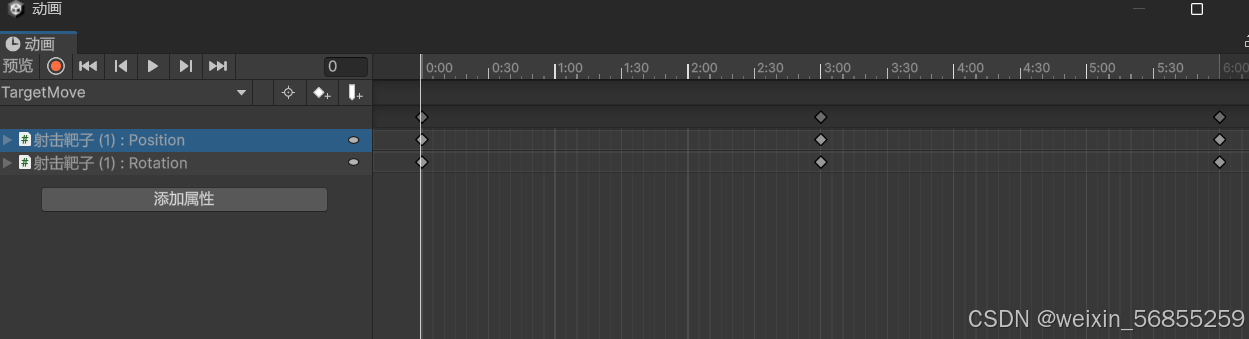
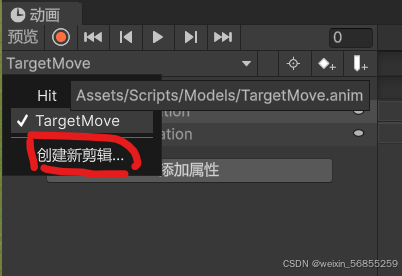
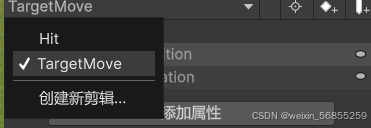
这里可以创建新剪辑,我已经创建好了。
想要控制属性,按照图示添加。

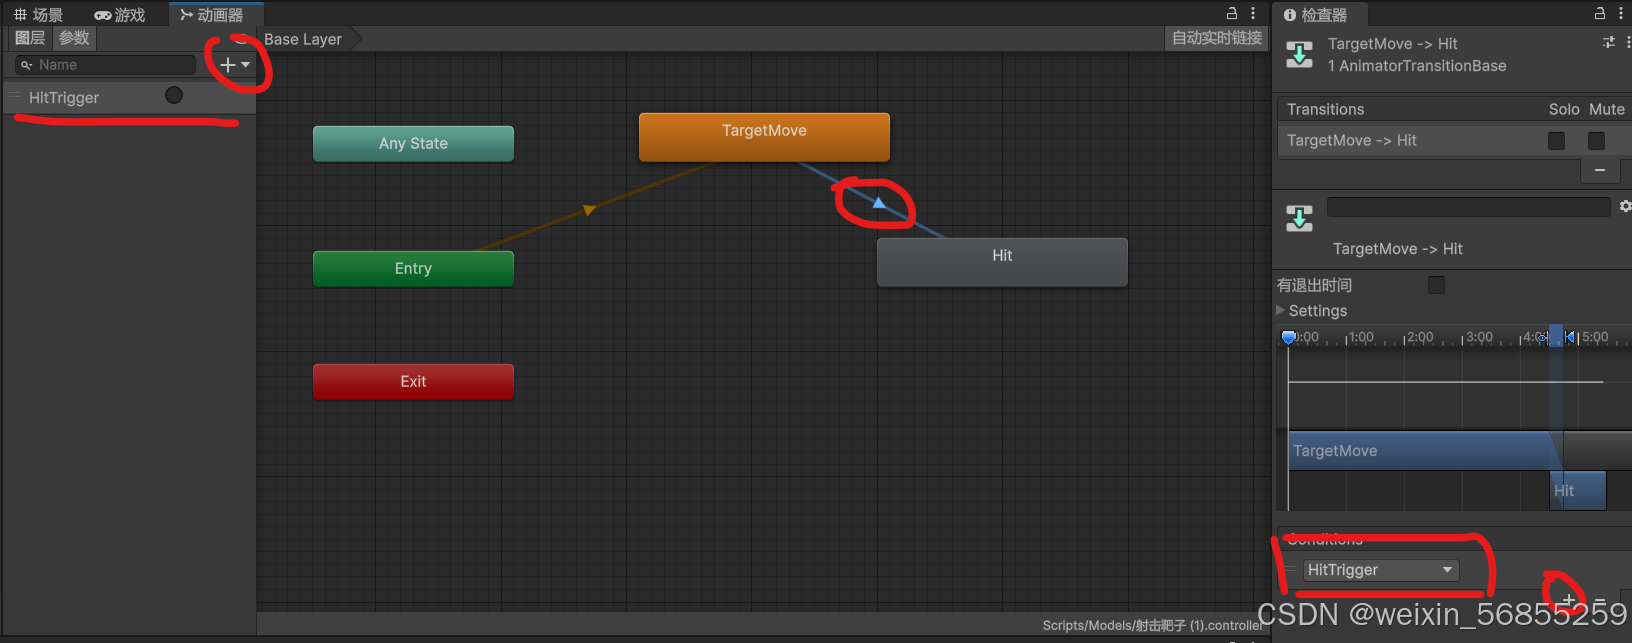
TargetMove负责靶子的移动,Hit负责靶子被击中后的动画。
动画器
按照下面图示连接剪辑,注意两个被圈出的过渡,需要设置条件。
十、多摄像机
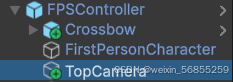
1.鸟瞰图
添加新的摄像头。
搭载下面代码

using UnityEngine;

public class TopDownCameraFollow : MonoBehaviour
{
    public Transform player; // 玩家对象
    void Start()
    {
        Camera birdEyeCamera = GetComponent<Camera>();
        birdEyeCamera.fieldOfView = birdEyeCamera.fieldOfView; // 强制更新 FOV
    }


    void Update()
    {
        if (player != null)
        {
            Vector3 newPosition = player.position;
            newPosition.y = transform.position.y; // 保持摄像机高度
            transform.position = newPosition;
        }
    }
}
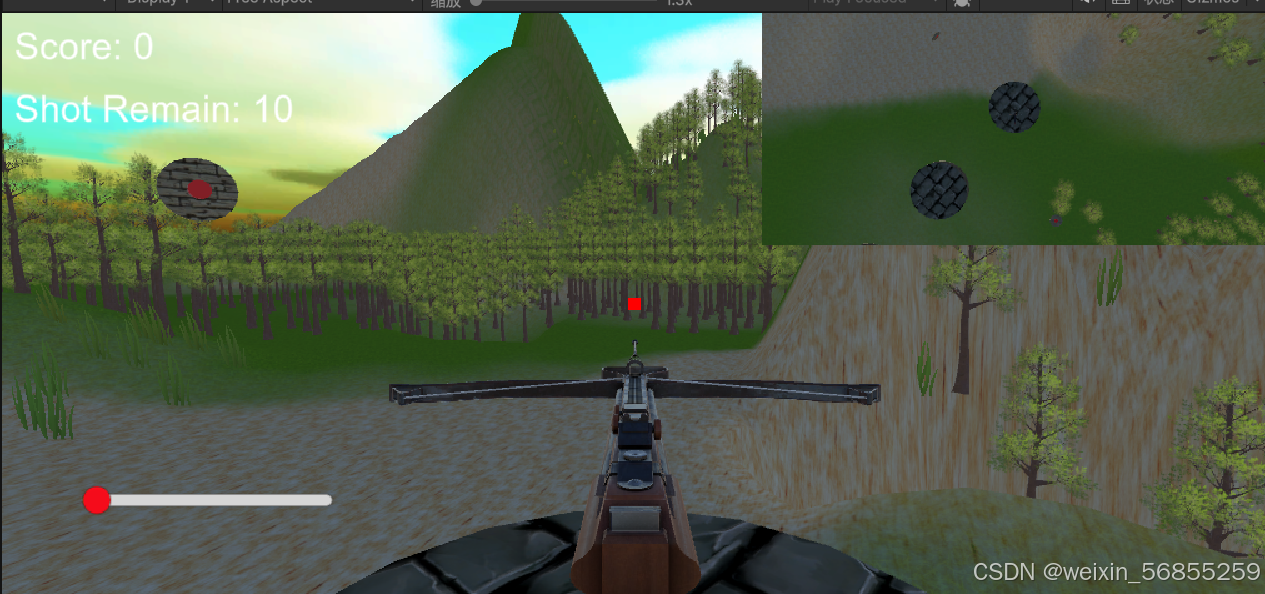
效果
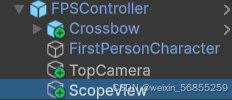
2.瞄准镜
添加新摄像头
搭载下面代码
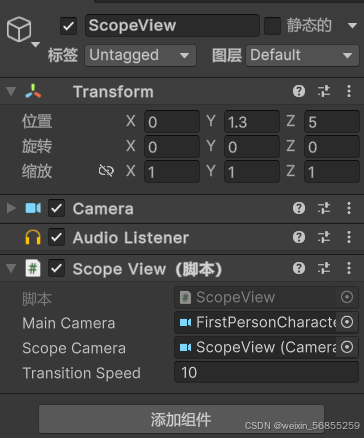
using UnityEngine;

public class ScopeView : MonoBehaviour
{
    public Camera mainCamera;
    public Camera scopeCamera;
    public float transitionSpeed = 10f;  // 过渡速度,可在 Inspector 中调整

    private bool isScoped = false;  // 标记是否处于瞄准状态

    void Start()
    {
        scopeCamera.enabled = false; // 默认禁用瞄准镜视图
    }

    void Update()
    {
        if (Input.GetMouseButtonDown(1)) // 右键按下
        {
            isScoped = true;
            scopeCamera.enabled = true;
            mainCamera.enabled = false; // 切换主摄像机状态
        }
        else if (Input.GetMouseButtonUp(1)) // 右键松开
        {
            isScoped = false;
            scopeCamera.enabled = false;
            mainCamera.enabled = true; // 切换回主摄像机
        }

        if (isScoped)
        {
            // 平滑过渡旋转
            scopeCamera.transform.rotation = Quaternion.Lerp(scopeCamera.transform.rotation, mainCamera.transform.rotation, Time.deltaTime * transitionSpeed);
        }
    }
}
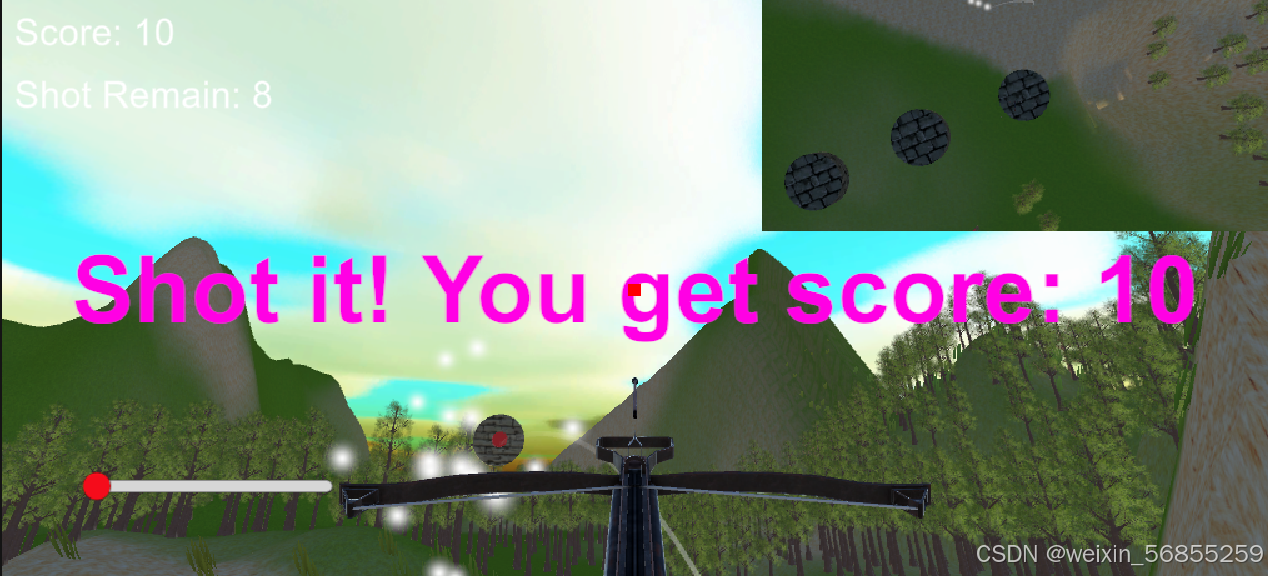
十一、分数显示效果
效果展示
新建Canvas,新建子对象Text
![]()
Canvas搭载下面的代码
using UnityEngine;
using UnityEngine.UI;
using System.Collections;

public class ScoreDisplay : MonoBehaviour
{
    public Text scoreText;            // 显示分数的Text组件
    public float displayTime = 2f;    // 分数显示的时间
    public static ScoreDisplay Instance;

    private RectTransform rectTransform;  // Text的RectTransform组件

    void Awake()
    {
        if (Instance == null)
        {
            Instance = this;
            DontDestroyOnLoad(gameObject);
        }
        else
        {
            Destroy(gameObject);
        }

        rectTransform = scoreText.GetComponent<RectTransform>();  // 获取RectTransform
    }

    // 显示分数的方法
    public void DisplayScore(int score)
    {
        scoreText.text = "Shot it! You get score: " + score.ToString();  // 设置显示的分数
        StartCoroutine(DisplayScoreCoroutine());
    }

    // 协程控制显示效果
    private IEnumerator DisplayScoreCoroutine()
    {
        // 设置初始位置在屏幕左侧
        rectTransform.anchoredPosition = new Vector2(-Screen.width, 0);  // 初始位置
        scoreText.gameObject.SetActive(true);

        float elapsedTime = 0f;
        float duration = 1f;  // 移动持续时间
        Vector2 targetPosition = new Vector2(0, 0);  // 目标位置(屏幕右侧)

        // 平滑移动到目标位置
        while (elapsedTime < duration)
        {
            rectTransform.anchoredPosition = Vector2.Lerp(new Vector2(-Screen.width, 0), targetPosition, elapsedTime / duration);
            elapsedTime += Time.deltaTime;
            yield return null;
        }
        rectTransform.anchoredPosition = targetPosition;  // 确保到达目标位置

        // 等待一段时间后隐藏分数
        yield return new WaitForSeconds(displayTime);

        // 隐藏分数
        scoreText.gameObject.SetActive(false);
    }
}
注意DisplayScore函数在前文的代码中被引用

十二、开弓蓄力进度条
为了优化玩家体验,添加蓄力进度条
Canvas添加Slider

Bow.cs配置
// UI 进度条
public Slider chargeSlider; // 进度条引用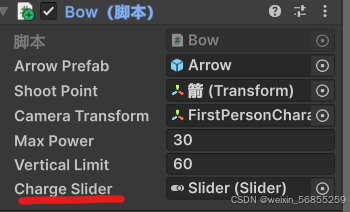
可以在此配置颜色
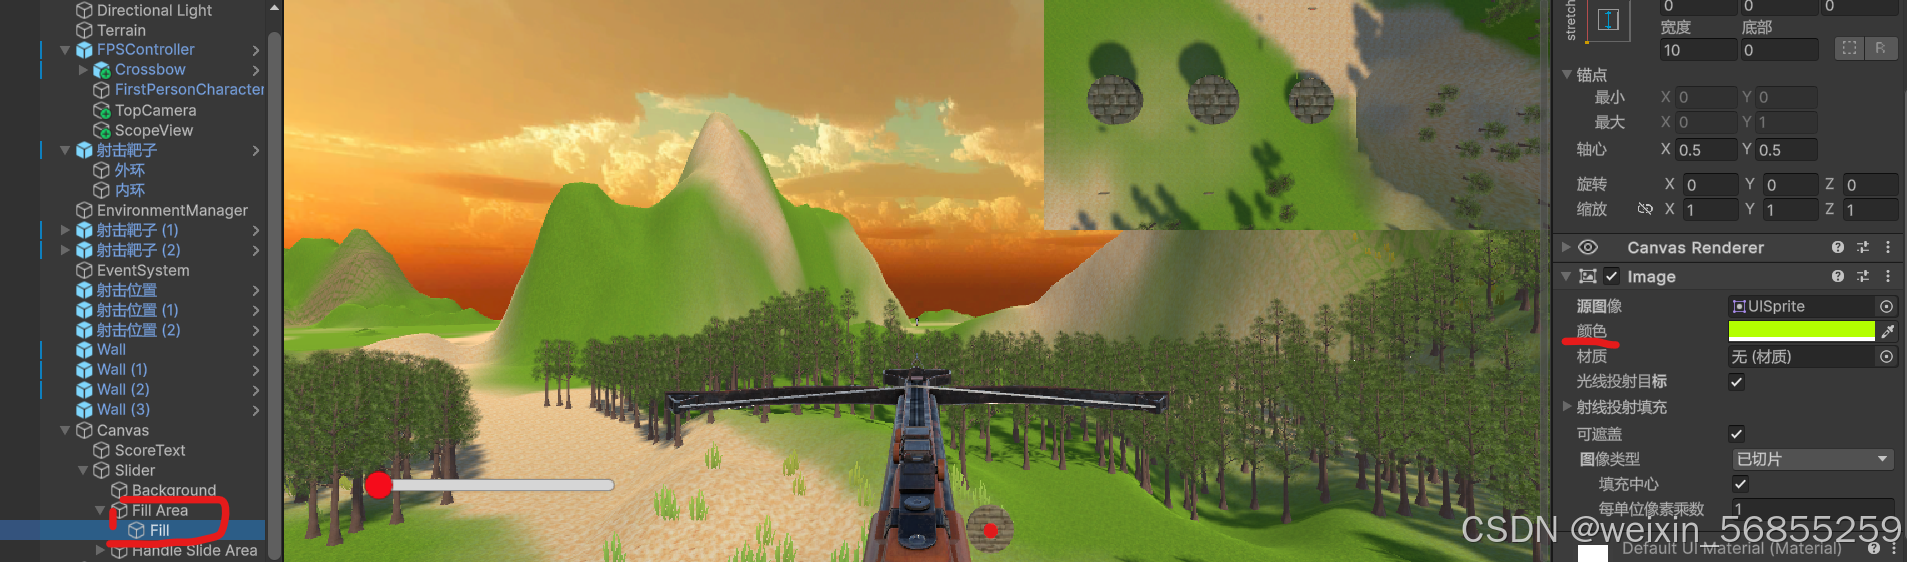
效果
项目地址
视频演示

分享前沿Unity技术干货和开发经验,精彩的Unity活动和社区相关信息
更多推荐
 25
25 0
0- 0


 已为社区贡献1条内容

所有评论(0)